Showing posts with label Ethnic. Show all posts

Saturday, October 16, 2010

Potato Cakes

'Ello, blogosphere!
What has it been now...a month since my last post? For those of you who I'm close to in real life, not just the wonderful world wide web, you know about all the craziness that has gone down the last few months. Everyone else, just know that I'm back. I'm cooking again, I'm baking again, and I'm sharing again!

My best best BEST friend, Marissa (teacup tattoo!), has a wonderful man in her life who happens to be from England. The three of us chat quite a bit (thank you, Blackberry...) and Mr. England talks about British food all the time. I don't know if it's because he's aware I'm a fat kid at heart or if he wants to show off all the tasty treats England has to offer. Either way, you won't hear me complaining!

Last week, I was home in New Hampshire when he mentioned Potato Cakes with Mushy Peas. I'm not going to lie: if I read that on a menu somewhere, I wouldn't order it. Maybe just the Mushy Peas part of it. I do love a good Latke, though, so after he went on about Potato Cakes, I decided I was going to whip up a batch for my mother and I.

THEY CAME OUT SO GOOD!!!!!!!!

Even the Mushy Peas! So good, in fact, I brought some to my sister and she wanted the recipe. Then I brought one into work this week and forks were coming in from all angles. My boss started expanding on the idea: Sweet Potato Cakes, anyone? Adding scallions? Sour cream?

The possibilities are endless. And inexpensive. My kinda dish!


Potato Cakes with Mushy Peas
Prep time: 10 minutes
Cook time: 15-20 minutes


3 large potatoes, peeled, diced, and boiled
2 tbsp Earth Balance soy butter, plus 2 tbsp for frying
2 tbsp - 1/4 cup unsweetened, full-fat soy milk
2 cloves garlic, minced
1/2 - 1 tbsp parsley
salt and pepper, to taste
1/4 - 1/2 cup unbleached flour

*I know the measurements aren't really exact. Since potatoes come in different sizes and starch levels, each batch might use a different measurement.

1. After you boil the potatoes, mash together the soy butter, milk, garlic, parsley, salt and pepper. You're basically making mashed potatoes here! Add the flour, starting with 1/4 cup. You're looking for a doughy consistency. It shouldn't stick to your hands but it shouldn't be too dense.

2. In a large frying pan over medium-high heat, melt the remaining soy butter. Form pancakes with 1/2 cup of the dough. You want them to be about 1/4-inch thick. Fry till a dark, golden, crispy brown and flip. When the other side is crispy, remove from heat and serve immediately.

Mushy Peas
Prep time: 2 minutes

2 cups frozen peas
2 tbsp soy butter
2 tbsp unsweetened soy milk
salt and pepper, to taste

1. Duh! Mush everything together! :) Serve with the freshly made Potato Cakes. I like my Mushy Peas right on top so each bite gets an equal amount of deliciousness.


Please promise me you'll try to make these! I'm a girl on a budget now and these are inexpensive, delicious, and you can make the dough and stick it in the fridge! You can eat them just like this, or maybe make them for breakfast like a hashbrown, or even a late night snack! Enjoy, ladies and gents!

Monday, June 14, 2010

Soft Corn Tacos

I love Mexican food. Mexi-Cali, Tex-Mex, and especially New Mexican. I've been saving up pictures of some amazing vegan dishes, all from the restaurant I work for, La Salita. If someone were to ask me what the difference is between Mexican and New Mexican food, I'd quickly reply, "THE CHILE!!!" No one does chile, like New Mexico...and no one does red chile like La Salita.

Sometimes when I'm standing up at the window at work, waiting for food orders, certain smells will catch me off guard and I'll crave whatever it is that smells so good. Lately it's been corn tortillas. More specific: soft corn tacos. Here's my tasty soft corn taco recipe that even includes a little La Salita Red Chile, which you can order HERE.


Soft Corn Tacos
Prep time: 10 minutes
Cook time: 10 minutes


4 corn tortillas
1 cup Textured Vegetable Protein
1 cup boiling water, plus 1/4 cup water, divided
1 tbsp olive oil
Shredded lettuce
(Tomato, if you want it.)
Vegan Cheese
Red or green chile

Taco Seasoning
This is a little something I always have in my cabinet, ready to go. It's so much better for you than that pre-made, high-sodium, store-bought seasoning!!!

1 tbsp chili powder
1/4 tsp garlic powder
1/4 tsp onion powder
1/4 tsp crushed red pepper flakes
1/4 tsp dried oregano
1/2 tsp paprika
1 1/2 tsp ground cumin
1 tsp sea salt
1 tsp black pepper

1. In a large bowl, mix TVP with boiling water and let sit for 10 minutes.

2. Heat olive oil in a large skillet over medium-high heat. Add hydrated TVP, Taco Seasoning, and 2 tbsp of water. Mix to combine. Cook for about 5 minutes; if more water is needed, add by the tablespoon until you get a nice taco "meat" texture.

3. To heat your corn tortillas, place tortillas on a plate, cover with an inverted plate, and heat for 30 seconds in the microwave. Assemble tacos with some chile, taco meat, veggies, cheese, and whatever else your little heart desires.

That's it, my dearies! Not much to it! We love these tacos, and I'm sure you will, too. Just know they're a tad bit messier because they're soft corn! And if you don't steam the corn tortillas, chances are, they're going to break on you. Just sayin'!

Does anyone happen to know what the difference between Mexi-Cali and Tex-Mex is?

Wednesday, May 12, 2010

Tabouli

A few weeks ago, I made the BEST new dinner ever: Falafel with Tzatziki Sauce. Naturally, I paired it with some Kale Chips because we always have kale in the fridge, but I also had a box (yes, a box) of tabouli mix and I thought it would go perfect with our mostly-Mediterranean meal. I was a little disappointed! The tabouli from a box is far too minty and really just wasn't so good. Cody didn't really love it, but the sister-in-law thought it was good because she had never had tabouli before. Nothing to compare it to!

Well, brother-in-law Chuckles B. Hornsworth is home from a work trip and needed his turn with delicious falafel. This time, though, I decided to make homemade tabouli. I'm pretty sure it was cheaper, and more fresh, and more delicious. So you simply can't lose! Unless, of course, you're like me and hate tomatoes so much that cutting them makes you gag a little. Baby steps.


Tabouli
Prep time: 30 minutes

1 cup boiling water
1 cup Bulgar Wheat
1 cup minced fresh parsley leaves
1/2 cup minced fresh mint leaves
1/2 cup finely chopped yellow onion
1-3 tomatoes, diced (I only used one. I hate tomatoes. But you could probably add more!)
2 cucumbers, seeded and diced
3 tbsp olive oil
3 tbsp lemon juice
1 teaspoons sea salt

1. In a large mixing bowl, pour the boiling water over the bulgar wheat and cover; let stand about 20 minutes until wheat is tender and water is absorbed. Add the chopped herbs and vegetables and toss with the mix. Drizzle the oil, lemon juice, and sprinkle the salt over the wheat mixture and mix well. Chill. Serve with warm pita chips or crackers.


I served it with the warm pita chips, but I also dished out some greek hummus because I think it's easier to put a lil' hummus on the pita and then try to get some tabouli on it. Food engineering, my friends. Both Cody & Deidra liked this tabouli better, especially Cody, who didn't really eat much of the boxed kind. It's the type of food that's better the next day, too; let those fresh spices sit and get friendly. It's amazing.

You know what else is amazing??? The jerky that I'm giving away!!! I'll announce the winner on Friday! So if you haven't entered yet, what are you waiting for??? :)

Monday, May 3, 2010

Vegan Paella

Paella (Spanish pronunciation: [paˈeʎa]) is a Valencian rice dish that originated in its modern form in the mid-19th century near lake Albufera, a lagoon in Valencia, on the east coast of Spain.

I can't say I know much about Paella. What I do know, I likey. I know the first time I had it, I went back for seconds. It was full of shrimp and muscles, had a mild taste but was definitely Spanish. I know that my beautiful, Cuban best friend loves Paella and her parents make it the best. I also know that it's rice made with saffron (which sounds so exotic when said best friend says it) and loads of veggies. To me, Paella is kind of like goulash: if you have something to put in it, PUT IT IN!!!

I had some veggies and lots of rice and grains, so this is the Paella I came up with:


Vegan Paella
Prep time: 15 minutes
Cook time: 20-30 minutes


1/2 cup quinoa* (pronounced /ˈkiːnoʊ.ə/ or /kwɨˈnoʊ.ə/ or keen-wah)
1 cup brown rice
2 3/4 - 3 cup vegetable broth
splash of beer, whatever you have on hand and are drinking while you cook, per order of Cuban BFFL
1 yellow onion, chopped
3 garlic cloves, minced
2 tbsp olive oil
1 green bell pepper, chopped
1 red bell pepper, chopped
2 cups artichoke hearts, quartered
14 oz diced tomatoes, lightly drained
15 oz kidney beans, drained and rinsed
1/4 tsp saffron, crushed
1/2 tsp cumin
2 tsp Spanish paprika
dash cayenne pepper
salt & pepper, to taste
1 cup frozen or fresh peas
black olives (I used oil cured black olives)
fresh parsley, coarsely chopped, for garnish

*I know quinoa isn't a traditional grain in Paella, but I had it on hand so I HAD to use it. Plus, it's so much fun to say! If you don't have any quinoa, just use an additional 1/2 cup of rice.

1. In a large saucepan, heat the olive oil over medium heat. Add the onions and cook until translucent, about 5 minutes. Add garlic and cook a little longer. Stir in the quinoa and/or the rice with the saffron; stir and cook for 2 minutes. Add the vegetable broth, peppers, artichokes, tomatoes, beans, cumin, paprika, cayenne pepper, and salt & pepper (if using). Bring to a boil and reduce heat to very low. Cover; cook for 15 minutes, stirring occasionally.

2. After 15 minutes, check on the grain. If it's a little dry, add 1/4 cup broth. If it's still hasn't absorbed all the liquid, keep cooking on low. I cooked for about 25 minutes after adding the extra 1/4 cup broth. Add the peas, stir, and cook until heated through. Garnish with black olives and fresh parsley.


I ate this with a sweet potato smothered in La Salita Red Chile for my pre-race meal. If you check out the carbs, you'll see I was on the right track! The serving size in the nutritional value if you're making it a MEAL. This is such a good side dish, though, so don't be turned off by it's high caloric and carb numbers! Bring it to a potluck or a BBQ. Make it and eat it as leftovers...trust me, it's better as leftovers! Whatever you do, however you serve it, just don't miss out on this amazing dish!

PS: Keep your eyes peeled for a giveaway, lovelies!

Saturday, April 24, 2010

Falafel with Tzatziki Sauce

If nothing in this blog title makes sense to you, keep reading and expand your horizon (and your tastebuds).

falafel |fəˈläfəl| (also felafel)
noun
a Middle Eastern dish of spiced mashed chickpeas or other pulses formed into balls or fritters and deep-fried, usually eaten with or in pita bread.
ORIGIN from colloquial Egyptian Arabic falāfil, plural of Arabic fulful, filfil ‘pepper.’

tzatziki |tsäˈtsēkē| (also tzatziki sauce)
noun
a sauce of Greek origin, made from yogurt, garlic, and cucumbers.
ORIGIN mid 20th cent.: modern Greek, from Turkish cacık.

Prior to last week, I had never eaten a falafel before. Thanks to the goalie in THIS movie:

...I had heard of them, but never experienced them. So I did a little research, checked out a few different recipes, and decided to throw my own together.

Before we go any further, I would just like to let you know that this is our new favorite. Not just C-Dizzle and mine, but also Dei, the not-so-picky-anymore one. We ate every last morsel and I've already made them again.

*Note: If you're going to be eating these, be prepared for garlic & onion breath for a full 24 hours. Make sure everyone you surround yourself with is also going to be eating falafel. Otherwise, you might seem toxic.


Falafel
Prep time: 10 minutes
Cook time: 10 minutes


15-oz can garbanzo beans (chickpeas), drained and rinsed
1 small onion, minced
3 cloves of garlic, minced
3 tbsp FRESH parsley, chopped
1 tbsp FRESH cilantro, chopped
1/2 lemon, juiced
1 tbsp tahini
1 tsp olive oil, plus 2 tbsp
1 tsp coriander
1/4 tsp turmeric
1/8-1/4 tsp crushed red pepper
2-4 tbsp unbleached all-purpose flour
Salt & pepper, to taste

1. In a large bowl, mash the garbanzo beans with a potato masher or a fork. Getting these as mashed as possible is key! Set aside. In a food processor, mince the onion and garlic cloves till finely minced (for the onion hater in your life!). Add to the mashed garbanzo beans. Add the parsley, cilantro, lemon juice, tahini, olive oil, coriander, turmeric, and crushed red pepper. Start out with 2 tbsp of flour. If you need more, add it 1 tbsp at a time. Add the salt & pepper, if using.

2. In a large skillet over medium-high heat, get 2 tbsp of olive oil nice and hot. Form the falafel mix into golf ball size balls, slightly flatten, and add to the pan carefully. Cook until a little darker than golden brown; flip and cook on the other side.

Tzatziki Sauce
Prep time: 5 minutes

2 6-oz containers PLAIN soy yogurt (meaning unsweetened!)
1 large cucumber, peeled, seeded, and diced
2 tbsp olive oil
1/2 lemon, juiced
1 tbsp FRESH dill, chopped
3 cloves of garlic, peeled
Salt & pepper, to taste

1. Combine all the ingredients in a food processor and blend until smooth.

Assembly

There is no science here! Take a warm flat bread or pita, spread a layer of tzatziki sauce, add lettuce, tomato (the picture is Dei's falafel. We do not consume tomato. Bleck!), whatever else your heart desires, and a little more tzatziki. I served this with tabouli, warm pita slices, and Kale Chips.

Here is the nutritional value for the falafel:


Look at all that protein! These would be great for carbo-loading, too.

And here is the tzatziki sauce:


The serving size here is a bit bigger than what you actually use, so don't be frightened by the calories!

This meal was so light, believe it or not, and very fresh. It's perfect for the upcoming summer weather and I have a feeling I'll be making it a lot! You should, too!

PS: There are still a few days left to enter my Alternative Baking Company Cookie Giveaway! The rules are easy: you just leave comments!

PPS: My mom is going to be here in 24 days! Woo hoo!

Thursday, April 22, 2010

Reuben

Who doesn't like a good Reuben sandwich? (I guess if you don't like sauerkraut, pastrami, Thousand Island dressing, or rye bread, you probably don't. Meh.) I love them. They're a little sweet, a little salty, and rye bread is deLISH. C-Dog and I were grocery shopping the other day and I came across a jar of sauerkraut. I put it in our basket and he was like, "We're never going to eat all that sauerkraut. You're crazy. Woh woh woh woh woh woh woh woh." I got it anyway, mostly because I wanted sauerkraut all over my Smart Dog.

(We're halfway through the huge jar. FTW.)

I love Smart Dogs, but I can't eat them everyday. I knew I had to come up with another way to utilize the sauerkraut, mostly just to prove the hubster wrong. That's when I remembered Reubens. When was the last time I had a Reuben??? It had probably been years, considering how long it's been since I've eaten meat. Well, our Reuben-less days are over, my friends!


Thousand Island Dressing
Prep tim: 5 minutes

1/4 cup Vegenaise
1/2 pickle, chopped, or 1/4 cup relish
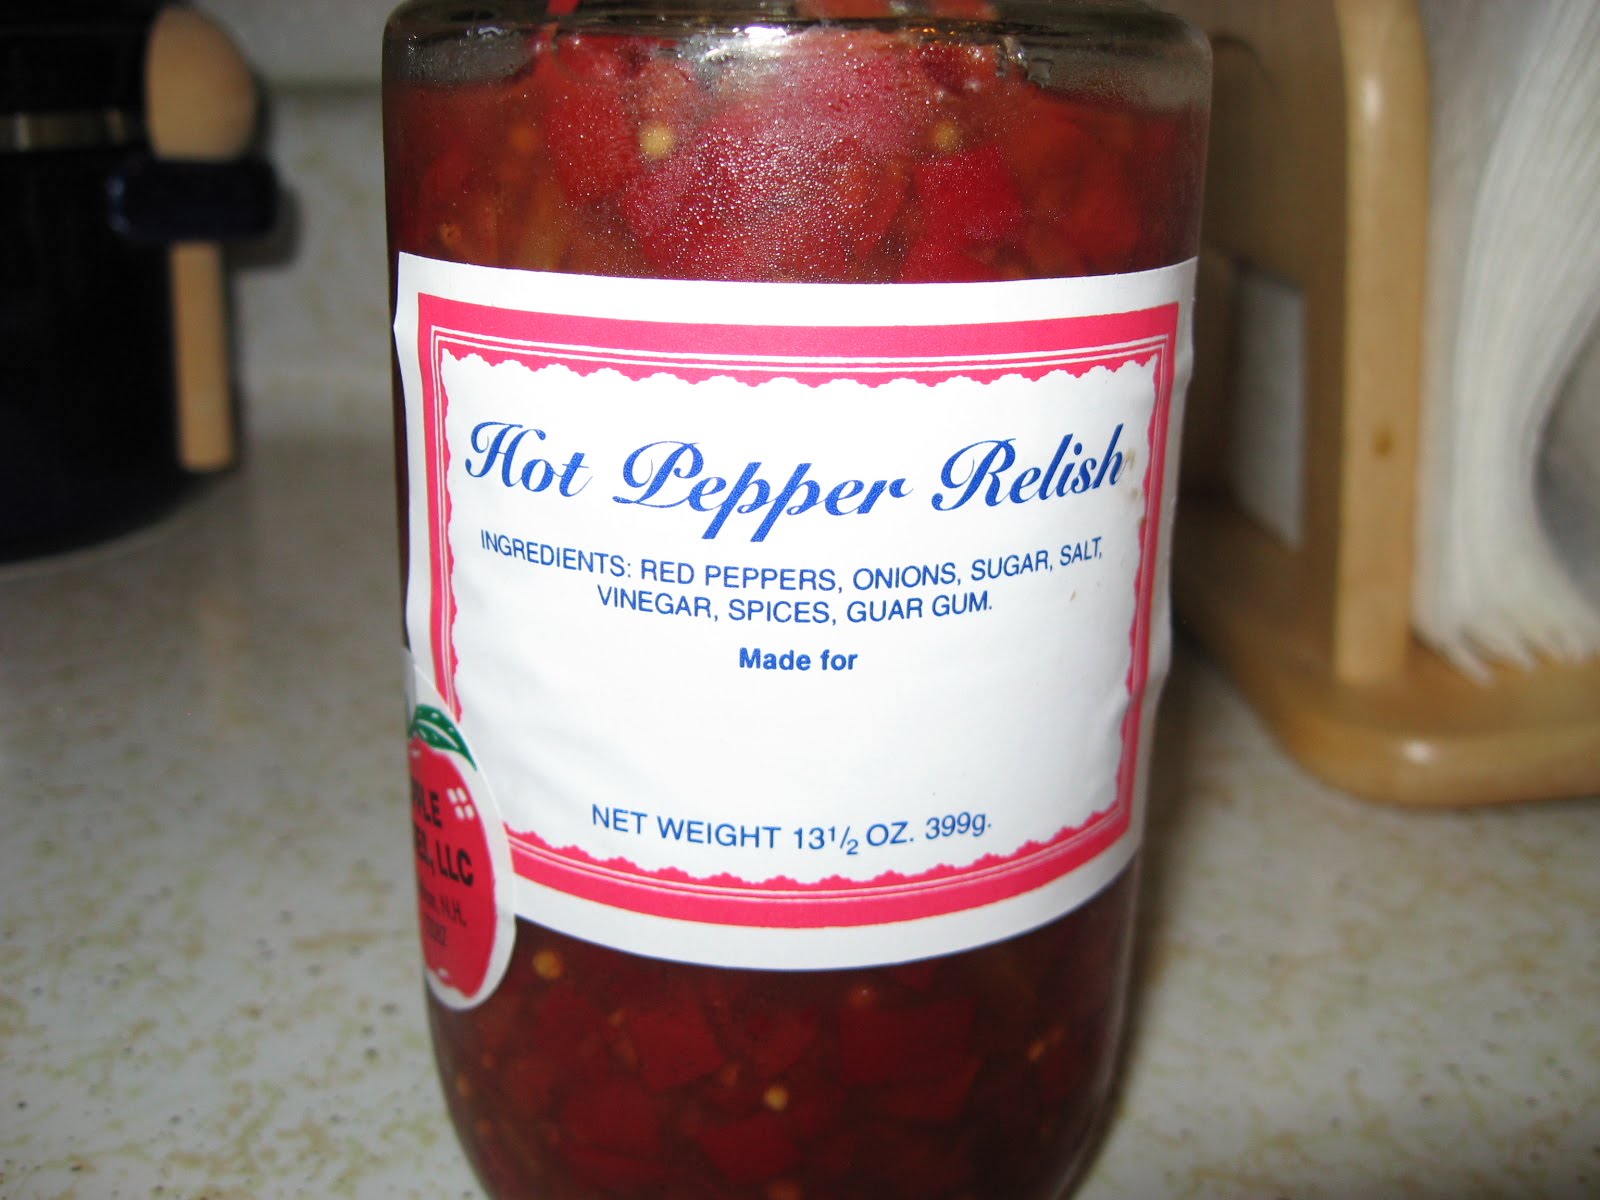
2 tbsp to 1/4 cup red pepper relish
1/4 tsp garlic powder

(This is the red pepper relish I used; thanks to my amazing sister for sending it to me from home!)


Reuben Sandwich
Prep time: 5 minutes
Cook time: 5 minutes


Seitan slices, or your favorite vegan sandwich meat
Rye bread
Earth Balance
Thousand Island Dressing, recipe above
Sauerkraut

1. I use a panini press for this, so if you have one, plug it in! If you don't, you can toast your bread in the toaster OR cook the sandwich in a large skillet. Butter one side of rye bread slices. Place buttered side down on the panini (or skillet), spread about a tablespoon to two tablespoons on the bread. Throw down a few slices of seitan or vegan sandwich meat, smother with sauerkraut, and top with the other buttered piece of rye bread. Press for 5 minutes or until golden brown. If you're using a skillet, cook on one side till golden brown, flip, and cook some more. If you're using a toaster, DON'T BUTTER YOUR BREAD FIRST, just toast and assemble.


We've had Reubens THREE TIMES since the sauerkraut debate. I pretty much love anything that comes out of my panini press (thanks, C & D!), plus I made a whole seitan love AND we've got all this sauerkraut. Works in my favor!

PS: If you haven't entered my ABC Cookie Giveaway, get on it! I'm giving away some of the best cookies in the world that happen to be vegan.


PPS: HAPPY EARTH DAY! Get out there today and go for a walk, pick up some trash, recycle, plant something, JUST GET OUTSIDE!!!


Wednesday, March 31, 2010

Asian Orange Tempeh

Happy Hump Day, bloggers! This week has been a little crazy and is only going to get crazier: a friend of mine from years ago is going to be in town tomorrow with a little band called Every Time I Die. I get to see Ryan every year or so when his band travels through town; I saw him a few years ago at Warped Tour and in 2008 with Dead and Divine. It's always so great to see him and I'm really looking forward to him getting into town! Do you have any fun plans for April Fool's Day?

This weekend, I had to pull a dig-through-the-cabinets meal. I didn't feel like going to the store and I had some stuff in the fridge I had to use up. Mandarin oranges, asparagus, tempeh, and couscous make up this amazing meal. I think you might just need to try this tempeh!


Asian Orange Tempeh
Prep time: 10 minutes, plus marinading time
Cook time: 15 minutes


8 oz package tempeh (I use Westsoy)
2 8-oz cans Mandarin oranges in juice, mashed
2 tbsp Bragg's Liquid Aminos (soy sauce or tamari will work, too)
1 tbsp freshly grated ginger
3 garlic cloves, minced
1/4-1/2 tsp red pepper flakes
1 tbsp coconut oil

1. Cut your tempeh into small triangles. The way I cut it, I get 16 pieces. Put into a large bowl with all the other ingredients and let marinade for at least 30 minutes (mine was hanging out for 6 hours!)

2. Heat coconut oil in a large pan over medium-high heat. Carefully place tempeh in the pan with enough room to flip. The key here is to get dark brown bits all over the tempeh. I promise, they don't taste burnt. They're amazing. Let the tempeh cook for at least 5 minutes before checking. Once they're dark brown, flip, and continue to brown. Ta da!


I paired my tempeh with some roasted pine nut couscous (so yummy!) and some steamed asparagus. Quick tip on the asparagus: I love roasting asparagus, but steaming it till al dente is also fantastic. To steam mine, I put about an inch of water in my pan along with on stalk of fresh rosemary and 3 cloves of smashed garlic. Put the steamer basket in, bring to a boil, and steam for 5-7 minutes. The flavored water adds just a hint of extra delicious to the asparagus.

Hope you all have a wonderful downhill to your week!

Tuesday, March 2, 2010

Curried Butternut Squash Soup

Sometimes I just want soup. In a bowl, in a mug, whatever the case may be, soup is as soothing to me as a glass of wine in hand while taking a bubble bath. Ok, not that soothing, but soothing nonetheless.

I'm also a huge fan of butternut squash. Mashed up like potatoes, cubed and roasted, or in ravioli, I have a soft spot for this yummy fruit-veggie. Combine my love of soup and butternut squash and you have one happy vegan. This soup was fairly simple to make, plus, all I had to go out and get was the squash!


Curried Butternut Squash Soup
Prep time: 10 minutes
Cook time: 60 minutes, plus 10 minutes


1 butternut squash, halved and seeded
1 large onion, peeled and quartered
1 medium head garlic
6 cups vegetable broth
1 bay leaf
1 teaspoon brown sugar
1 teaspoon mild curry powder
1/2 teaspoon dried oregano
1/2 teaspoon ground cinnamon
1/4 teaspoon ground nutmeg
salt and pepper to taste
1 cup plain soy yogurt

1. Preheat oven to 350° F. Line a baking sheet with parchment paper or aluminum foil.

2. Place squash halves and onion onto the prepared baking sheet. Wrap garlic in foil and set with other vegetables. Roast in the center of the oven for 45 to 60 minutes, until the squash is tender. Remove from oven and set aside until cool enough to handle.

3. Squeeze garlic cloves out of their skin like paste into a food processor. Scrape the flesh from the squash and place into the food processor along with the roasted onion. Puree until smooth. Add vegetable broth if necessary. Transfer the pureed mixture to a stockpot and stir in vegetable broth. Season with the bay leaf, brown sugar, curry powder, oregano, cinnamon, nutmeg and salt and pepper to taste. Bring to a boil and simmer gently for 10 minutes. Remove from heat and stir in soy yogurt. Remove bay leaf and serve hot.


*I double checked this recipe and its analysis. It is correct. 111 calories. It's a little high in sodium, but if you use low sodium vegetable broth, that'll knock some of it outta there for you!

This soup had the sweetness of the butternut squash and brown sugar with the pungent flavor of the curry topped with the smoothness of the yogurt. It was even better the second day. Pair it with a samich or some homemade bread and you've got yourself a meal. Enjoy!

Monday, February 22, 2010

Peanut Crusted Tofu

A few weeks ago, Cody & I drove up to Colorado with our "married friends" to see Manchester Orchestra (If you haven't checked them out yet, you really need to get a move on! We JUST found out they're coming to Albuquerque May 9. Yesssss.....). I posted a recipe for some delicious Seitan Buffalo Wings that I recreated from our trip, now I'm going to post another Colorado favorite.

Before the concert, we went to this brewery in downtown Colorado Springs and I can't remember the name of it for the life of me. Cody & I split a salad (yes, we split a salad) and drank a couple of tasty beers. The salad had this amazing ginger sesame dressing, soba noodles, shredded carrot, bean sprouts, a massive fried wonton, and peanut crusted tofu. The tofu was amazing! Since I almost always have tofu in my fridge, I decided to try my hand at this dish.


*The plate looks kinda boring and lacks color. I should've thrown some kale on there or something. How unattractive!

Peanut Crusted Tofu
Prep time: 10 minutes
Cook time: 15 minutes


1 (14 ounce) package extra firm tofu, drained
1 teaspoon salt
1/4 cup unsweetened soy milk
1 tsp lemon juice
1/4 cup unbleached flour
1/3 cup dry-roasted peanuts
1/2 teaspoon garlic powder
1/2 teaspoon ground ginger
1/2 teaspoon crushed red pepper
2 teaspoons peanut oil
Cooking spray

1. Cut tofu crosswise into 8 equal pieces. Cut each piece into two triangles. Arrange tofu in a single layer on several layers of heavy-duty paper towels. Cover tofu with additional paper towels. Place a cutting board on top of tofu. Place a few heavy cans of whateveryouhaveinyourcabinet on cutting board. Let stand 20 minutes. Pat tofu dry with paper towels.

2. Combine soy milk and lemon juice in a shallow dish. Let curdle. Place flour in a separate shallow dish (add a little salt and pepper if you're feeling zesty!). Place peanuts in a food processor; process until finely ground. Combine ground peanuts, garlic powder, ginger, red pepper, and salt in a shallow dish.

3. Dredge each side of the tofu triangle in flour. Dip in the soy milk mixture, then dredge in peanut mixture. Heat 1 teaspoon oil in a large nonstick skillet coated with cooking spray over medium heat. Add half of tofu; cook 2 minutes on each side or until browned. (Watch closely to prevent burning.) Repeat procedure with remaining 1 teaspoon oil and tofu.


I paired the tofu with some homemade gyoza. I took the "meat" recipe from HERE and carefully filled some homemade vegan wonton wrappers. I have some gyoza dipping sauce (HOT) in my fridge, so we dipped both the gyoza and the tofu in there. It was a pretty good meal! I'll definitely make it again.

Hope you have a fabulous Monday!

Tuesday, February 9, 2010

CoCo Ichibanya

Have you ever found a food that you knew you would never again be able to live without? The kind of food that you (or your wife) would crave whilst pregnant? A food so delicious, you ate it at least once a week, even after three years of eating it? Those of us "lucky" enough to be stationed on Okinawa, Japan have found that food. It comes in the form of curry.


You could bet your bottom dollar that if you passed by a CoCo's, there would be more Americans than Japanese there. Chicken cutlet with cheese? Level mild through 10? Side of Na an? Absolutely. Cody was a chicken cutlet boy, like most Americans. We only got the half order because it was the perfect amount of sticky rice. Plus it came with a drink. We also worked the level 10 curry like it was our job. I switched from the popular chicken to shrimp....then to vegetable. The had these spicy potato croquettes that were a great little appetizer. Mango and milk desserts...ice cream at the front...toys for the kiddos. This place was pure belly-burnin' heaven. I obviously needed to make it my life-long goal to recreate this dish.

Let's start with the cutlets.

I made homemade seitan last week to recreate a different dish (to be posted later. This is far more important.) Seitan is actually easy. It's cheaper than buying pre-made fake meat, plus it's more versatile. I had a mound left, so I thinly sliced it into culet-esque shapes, dredged them in flour, buttermilk, then panko bread crumbs. The gluten seitan itself takes a bit of time to prepare, so make sure you plan accordingly. Here's the seitan recipe:

Seitan
Prep time: 10 minutes
Cook time: 1 hour


1 1/2 cups vital wheat gluten flour (You can easily find this in the bulk section of Whole Foods!)
1/4 cup nutritional yeast flakes (Again...Whole Foods)
1 cup very cold water
1/2 cup soy sauce (I used about 1/3
1 tablespoon tomato paste
2 cloves garlic, pressed or grated on a microplane grater
1 teaspoon finely grated lemon zest

Simmering Broth
10 cups water or vegetable broth
1/2 cup soy sauce (I would use either the broth or the soy sauce. Not both.)

1. In a large bowl, mix together Vital Wheat Gluten Flour and nutritional yeast flakes.

2. In a seperate bowl, mix together reamining ingredients: water, soy sauce. tomato paste, garlic, lemon zest.

3. Pour the wet ingredients into the dry and combine with a firm spatula, knead dough for about 3 minutes until a spongy, elastic dough is formed. Let dough rest for a couple of minutes and prepare your broth, but don't start boiling it.

4. Now roll your dough into a log shape about 8 inches long and cut into 3 equal sized pieces. Place the pieces in the broth. It is important that the water/broth be very cold when you add the dough, it helps with the texture and ensures that it doesn't fall apart. Partially cover the pot (leave a little space for steam to escape) and bring to a boil.

5. When the water has come to a boil set the heat to low and gently simmer for an hour, turning the pieces every now and again.

6. Now you've got gluten. Let it cool in the simmering broth for at least a half an hour. It is best if it cools completely.

7. What you do next depends on the recipe you are using. If it calls for gluten use it as is. If you want to store some of it for later use put it in a sealable container covered in the simmering broth.

8. If your recipe calls for seitan cut your pieces up as desired.


There's more to the seitan recipe, but I'm going to get you started on the rice next. Good sticky rice is so important. I think I've finally mastered it. I made too much last night, but it's ok, because dessert was rice pudding. Here's the sticky rice recipe:

Sticky Rice
Prep time: 10 minutes
Cook time: 15 minutes


3 cups medium grain white rice
3 cups water
3 tbsp rice vinegar
1 tbsp sugar

1. In a colander with a large bowl underneath, place rice under running water. Press and move rice until water gets cloudy. Remove the colander, dump the water bowl, and repeat until the water is no longer cloudy. This is extremely important! I wouldn't skip this step. The result isn't pretty.

2. In a rice steamer or large pot over medium heat, add the rinsed rice and the 3 cups of water. Steam until steamer is done. If using a pot, check often to make sure rice isn't burning or sticking. Rice is done when the water is gone.

3. In a small bowl, microwave the rice vinegar and sugar until the sugar is dissolved. Add to the rice, fluff, and there you have it! Sticky rice!


Now we have to prepare our cutlets.

Seitan Cutlets
Prep time: 10 minutes
Cook time: 10-15 minutes


1 seitan log (as made above)
1/2 cup unbleached flour
1/2 cup unsweetened soy milk
1 tsp lemon juice
1/2 cup panko bread crumbs
salt & pepper, to taste
2-4 tbsp vegetable oil

1. Slice your seitan log to make 4 1/2-inch thick cutlets. In separate shallow bowls, set aside one with flour (and salt & pepper, if using), one with soy milk and lemon juice (stir and let curdle), and one with panko bread crumbs.


These bread crumbs are important for the whole experience. I found mine at a regular grocery store in the Asian isle. You shouldn't have a problem coming across them!

2. Heat the oil in a large pan over medium heat. Take one cutlet and completely coat in flour. Get in the nooks & crannies! After floured, coat in soy milk mixture. Then get it covered with panko bread crumbs, pressing to make sure it's coated well. Carefully place in the pan. Repeat till all the cutlets are in the pan.

3. After a few minutes, check the cutlets to make sure they're a golden to dark golden brown color. Flip to brown on both sides.

While the cutlets are cooking...

This is another little nugget I found in the Asian isle of Smith's. If for some reason your grocery store doesn't carry it, check at Whole Foods or even better, a world market, if you have one.


Curry
Prep time: Hardly any!
Cook time: 5-10 minutes


1 box S&B Curry
1 2/3 cups water
Habanero powder, to taste
CoCo Curry powder, if you're lucky enough to still have some

1. In a medium saucepan over medium-low heat, add 1 2/3 cups of water. Place your broken up curry pieces into the pot and stir well. Add spice to taste. If you're like us, you'll run out of habanero powder.

2. Assemble plate: the sticky rice goes in a half moon shape on one side of the plate. The other side of the plate is for the cutlet. The curry is put on top of the rice...then I mix it all together, close my eyes, and enjoy. Here's what my plate looked like:


Naturally, as I was making dinner, I had to send a mass text out letting all of our now-stateside friends what I was making. Just as naturally, I got a few "jealous!", "send me some", and "make sure you blog about it!". So here it is, my dear friends. CoCo's Curry.


Monday, January 25, 2010

Black Bean Burgers

I have some of the greatest friends in the world. Seriously. And they're spread out around the world. America, Canada, Japan, Puerto Rico...this blog is for my beautiful Tina in Puerto Rico.

I met Tina in Japan. We worked together and instantly became likethis. One of the things I loved about her was that she knew all these crazy places to go off base. She had the best little shopping spots and knew all the best eats! One of my favorites that she brought me to was Seaside Jet City Burgers. It was literally on the beach, in a hut, playing nothing but Jack Johnson. :) Yeah, I know. Perfect.

Anyway, my favorite burger (yes, hamburger) was one covered in grilled pineapple and avocado. I couldn't get anything else when we went because this combination was just amazing. Here are a few pictures of my adventures with Tina:


Eating tantan noodles....our favorite!

At the seawall after an amazing day of laying in the sun!


Chula-U...a pool spa she introduced me to. I don't know if we went enough!!!

After a night of Y50 beer. Boy...vegan did my body good!

We have been through so much together, Tina & I, and I love her more than she could ever know. It's been almost a year since we spent time together in Florida and I really hope I get to see her face soon.

On to the food!

I mentioned my favorite SSJCB burger and I decided to recreate it. Duh. That's what I do. :) Here is my black bean burger, which I topped with grilled pineapple and avocado.


Yes, those are kale chips. I was skeptical at first, but kale was on sale at Whole Foods and I made them. Holy crap, so good. Even Cody loved them!

Black Bean Burgers
Prep time: 15 minutes
Cook time: 10 minutes


1/2 cup rolled oats
1/2 medium onion, chopped
1/2 cup black beans, drained & rinsed
1/2 cup frozen corn, thawed
1/4 cup whole wheat flour
1/4 cup vital wheat gluten
1/2 tsp baking powder
1/4 cup nutritional yeast
1 tbsp olive oil
1 tsp onion powder
1 tsp garlic powder
2 tsp chili powder
1/4 tsp cumin
1/4 tsp cayenne
1 tsp seasoned salt
1 tbsp balsamic vinegar

1. Preheat oven to 400° F degrees.

2. Pulse all the oats in food processor until coarsely chopped. Place in mixing bowl.

3. Place medium chopped onion, 1/4 cup of the black beans and 1/4 cup of the corn and pulse until coarsely chopped. Add to the oats.

4. Add remaining black beans, corn and remaining ingredients to the oats and mixed beans. Mix together well.

5. Form into 4 patties. Place on oiled cookie sheet and cover with foil. Place in oven for 5 minutes, flip and cook 5 more minutes.


So easy, so delicious, so good for you! I toasted some buns, put a little veganiase on the bottom, iceburg lettuce, avocado slices, then I grilled up some pineapple that I put on top. Honestly, the spice of the black bean burger is cooled by the avocado then sweetened by the pineapple. It might just be this summer's perfect dish. And the kale chips....stay tuned for the kale chips!!!

Tina, if you read this, I hope you know how much I love you & miss you & how grateful I am to have such a wonderful woman in my life to call my friend! I LOVE YOU!!!

Monday, January 18, 2010

Pad Thai & Lettuce Wraps

My husband has been gone for the entire weekend, so I've been doing nothing but cleaning and cooking. When he's gone, I barely know what to do with myself! So I do what I do best. Cook & clean. :) I made some delicious gluten free AND vegan mac & cheese ala Erin...tasty gluten free chocolate chip cookies (yes, they were tasty...)...and yesterday I made some Pad Thai & Lettuce Wraps. Now, the lettuce wraps weren't really wrapped, I just needed a name. I made this gyoza "meat" but couldn't find vegan wrappers, so I just placed the "meat" in a piece of lettuce. Worked perfectly!


**My pictures usually aren't great. This one is even worse because I had to take it with my phone as the husband has our camera. Oh well.

Pad Thai
Prep time: 10 minutes
Cook time: 10 minutes

From Skinny Bitch in the Kitch

6 oz rice stick noodles
1/4 cup agave nectar
1/4 cup mirin (Japanese rice wine)
3 tbsp ketchup (yes, ketchup!)
3 tbsp tamari or soy sauce
1 1/2 tbsp lime juice
1 tbsp sriracha or other chili sauce
2 tbsp refined coconut oil
14 to 16 oz extra-firm tofu, cubed
1/2 red onion, cut into 1/4-inch slices (I love onion so I used the whole thing!)
2 cloves garlic, minced
3 scallions, halved lengthwise and cut into 2-inch pieces
2 cups bean sprouts
1 carrot, shredded
1/4 cup chopped fresh cilantro, mint, or a combination
1/4 cup chopped roasted peanuts
4 to 8 lime wedges

1. Cook the noodles according to package directions. Drain and set aside.

2. Meanwhile, in a small bowl, whisk together the agave, mirin, ketchup, tamari or soy sauce, lime juice, and sriracha; set aside.

3. Heat the coconut oil in a 12-inch wok or skillet over high. Add the tofu and stir-fry for 4 minutes. Add the red onion and stir-fry for 30 seconds. Add the garlic and stir-fry for 30 seconds. Add the noodles and agave nectar mixture and stir-fry until the noodles are softened and evenly coated with sauce. Add the scallions, bean sprouts, and carrot and stir-fry until all the ingredients are well combined and heated through.

4. Transfer the pad thai to plates or platter, garnish with cilantro or mint, peanuts and lime wedges, and serve.


It was really good! I love the spice and the sweet and the citrus. I will definitely be making more of this! Now for the Lettuce Wraps. I am so fond of these because they're so easy & I was able to do my own thang!

Lettuce Wraps
Prep time: 5 minutes
Cook time: 10 minutes


8 large pieces of lettuce, preferably the outside pieces that are stiff and curved
1 cup dry TVP (Textured Vegetable Protein granules! You can buy these in a bag or in the bulk section.)
2 cups boiling water
2 tbsp sesame oil
1 cup mushrooms, minced
1 small onion, minced
1 carrot, finely grated
3-inch piece of fresh ginger, peeled and minced
3 tbsp soy sauce
1-2 tbsp rice wine vinegar

1. Place the TVP in a bowl and pour the boiling water over it. Stir, and let sit for a few minutes until softened.

2. In a skillet, heat the sesame oil and add the vegetables, sautéing until the onions are translucent. Add the softened TVP, soy sauce and vinegar, and cook several minutes on high heat until all the liquid has boiled off. Stir frequently during this, to keep the mixture from burning or sticking to the pan.

3. Remove from heat and let cool slightly.

4. Spoon about 1/2 cup into each piece of lettuce. Serve as is or add a touch of chili sauce for garnish and added heat.


These two items on one plate was choice! It was such a light dish, and as you can tell, pretty low in calories! I've been calorie counting since the new year (it wasn't a New Year's Resolution, it was just a change!) and I am so glad this meal is tasty and low-cal. I hope you get the chance to try it!